Creating our Dream Kitchen
One of my favorite elements of our Airstream Argosy renovation is our Airstream Kitchen Remodel. I had this dream of a big beautiful butchers block countertop that extended from our kitchen to make a bar table that we could eat and work at.
In our Fiber Stream, the dinette turned into the bed so we could never have both at once and very often would just eat and work in bed to avoid the hassle of breaking down the bed and finding some place to store the heavy mattress toppers. It was such a pain… I wanted a working/eating area to be a priority in our new home on wheels so I worked the layout over and over and over again until we ended up with this –
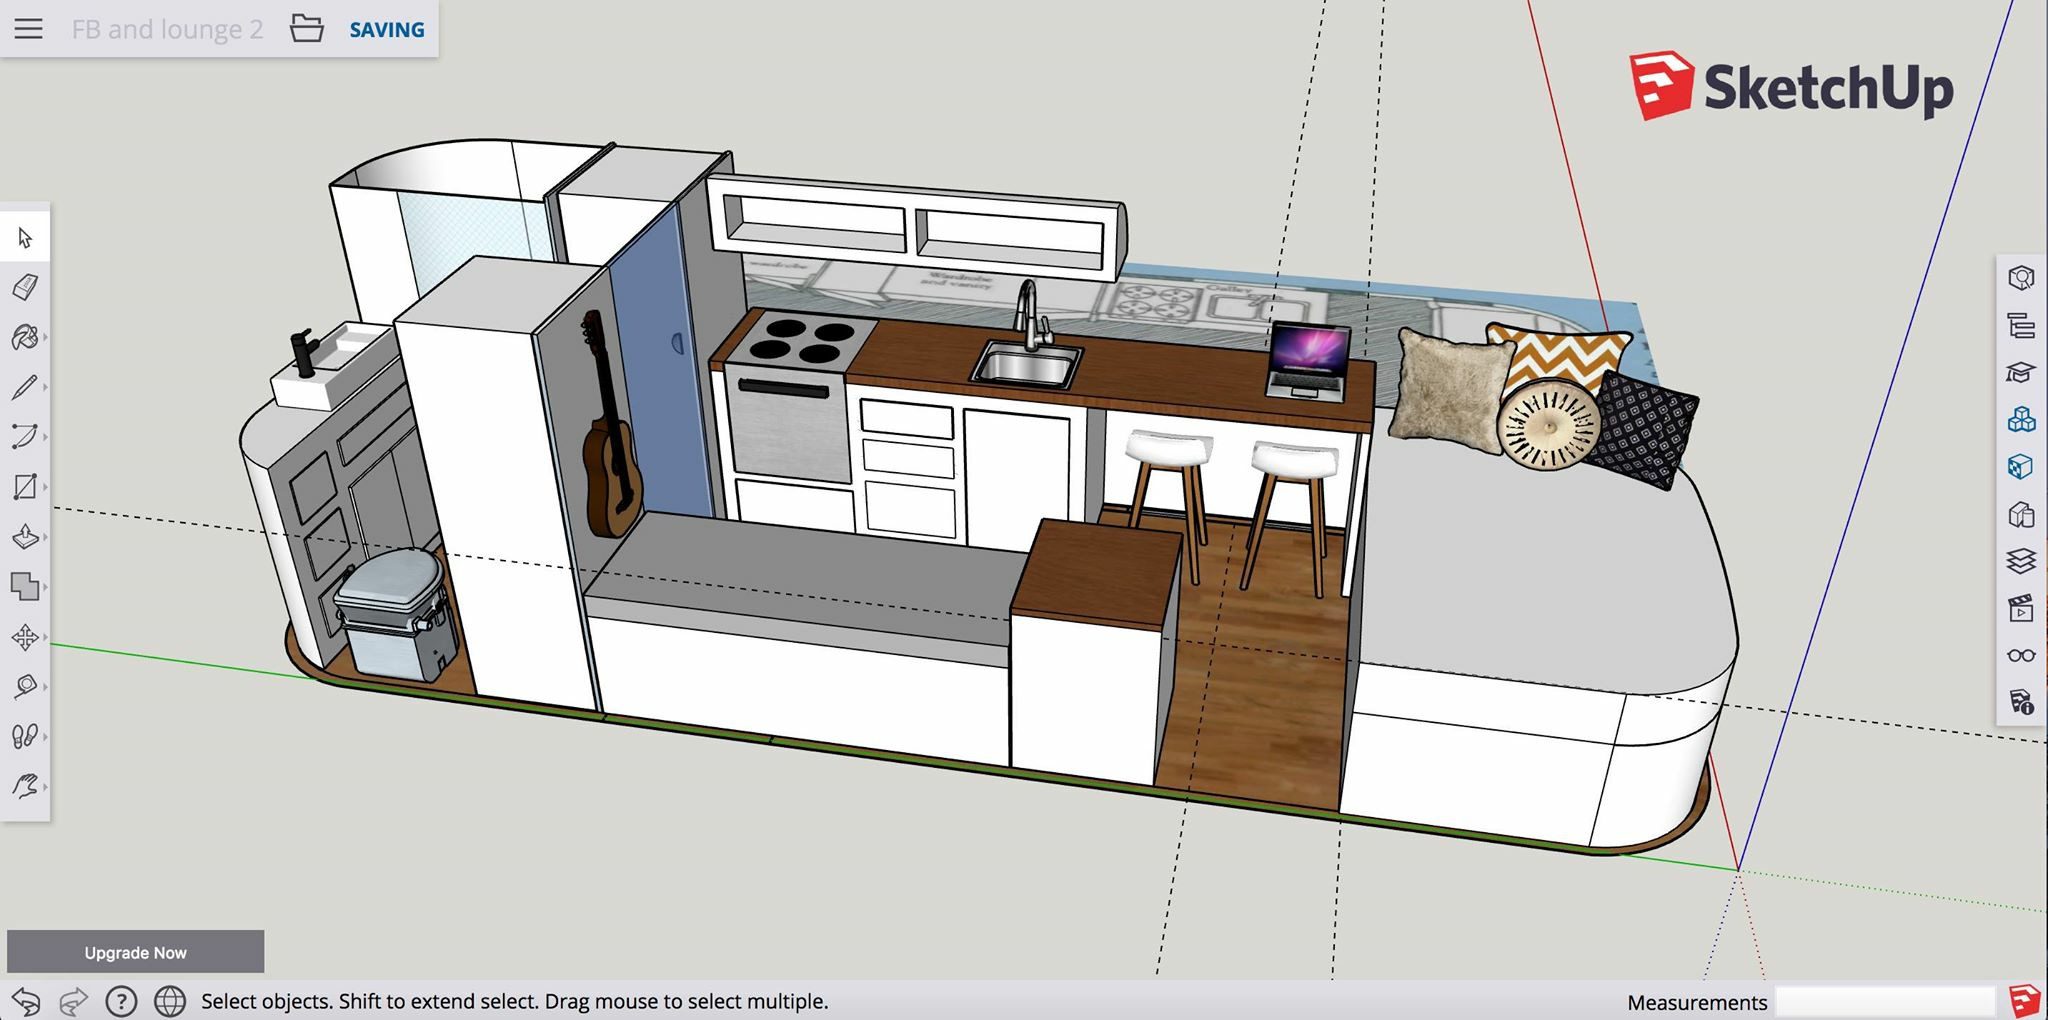
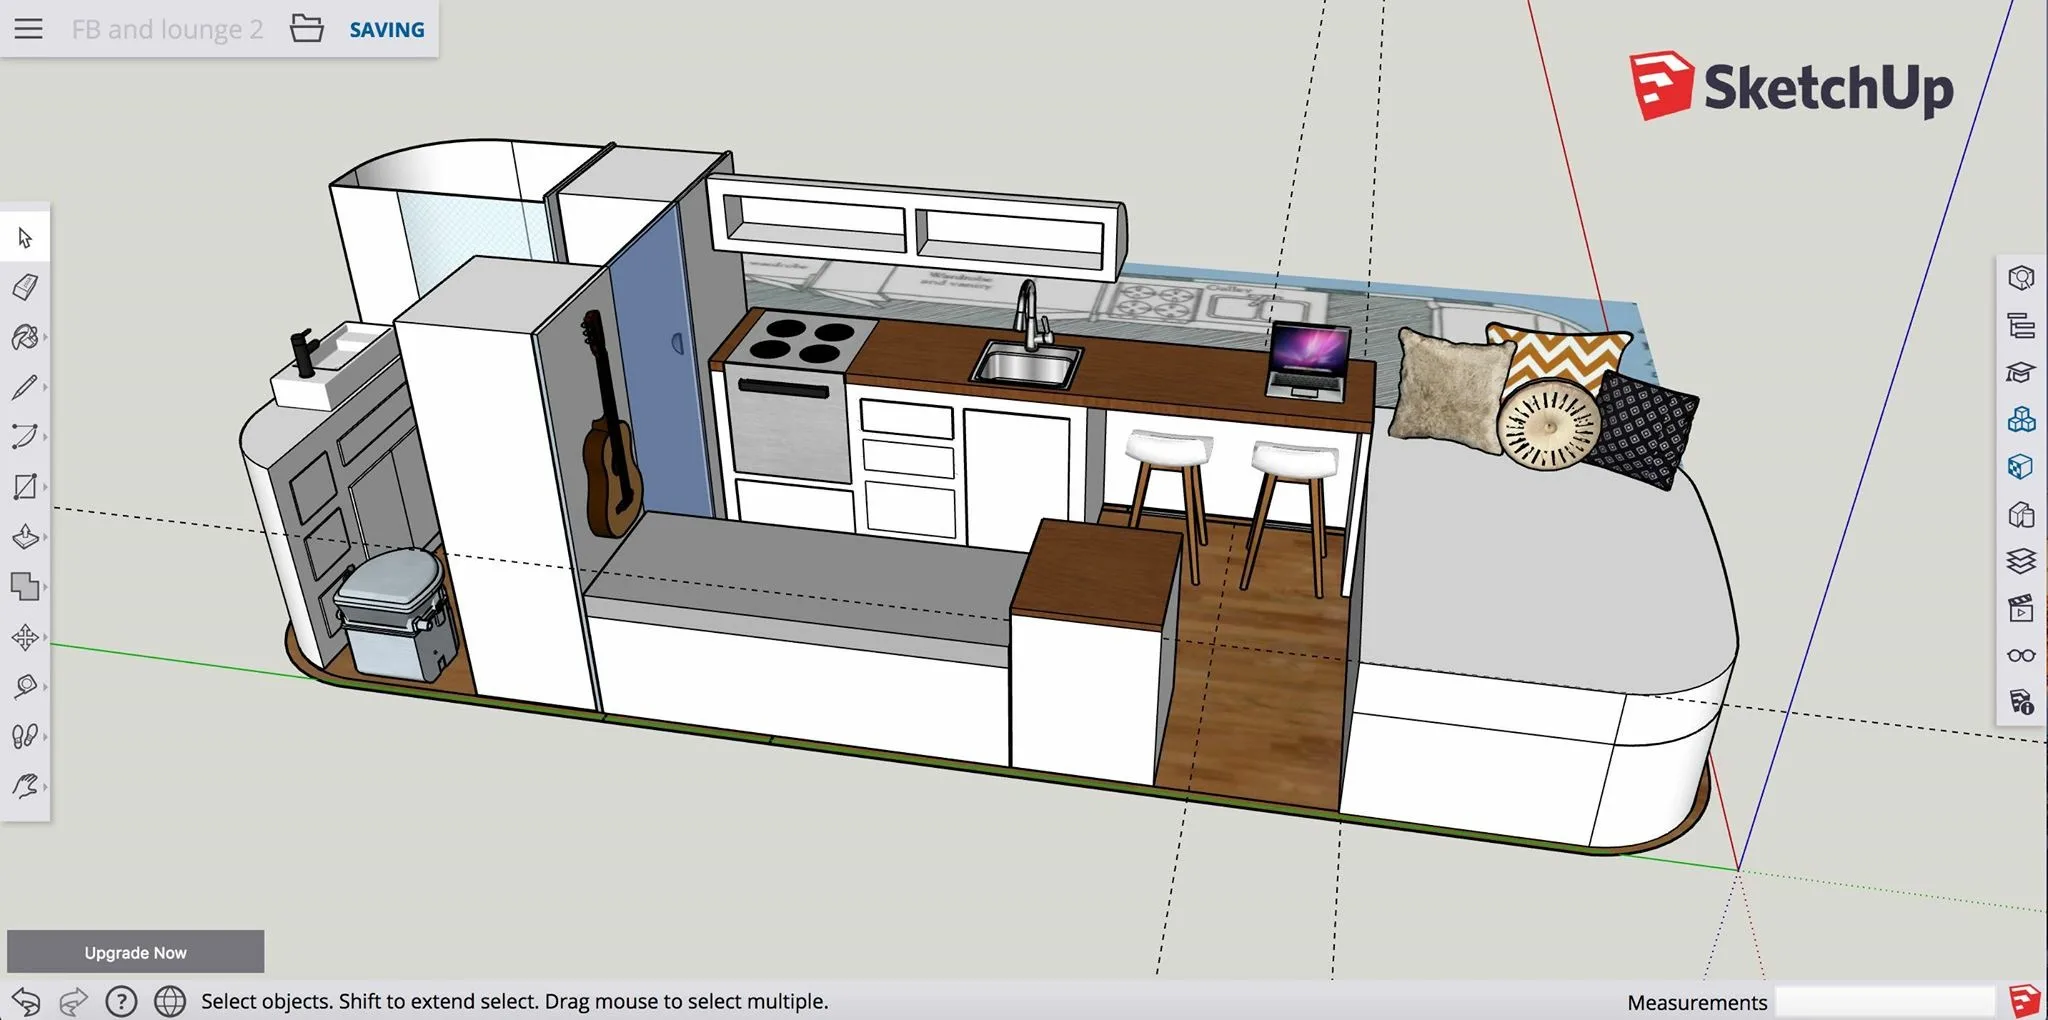
We stayed pretty true to the model, except the shower and toilet swapped sides for plumbing reasons, I moved the sink to where the stove is, so it would be under the window and the little fridge by the door is actually a floor to ceiling structure with a bigger fridge. We’ll also be adding cabinets over the couch or what I refer to as “the reading nook” to expand storage. I knew I wanted these at the time but they blocked visibility in the design, so I left them out. Also, the glass door separating the bathroom actually a cool vintage door we found.
Finding the Right Counter Top for our Airstream Kitchen
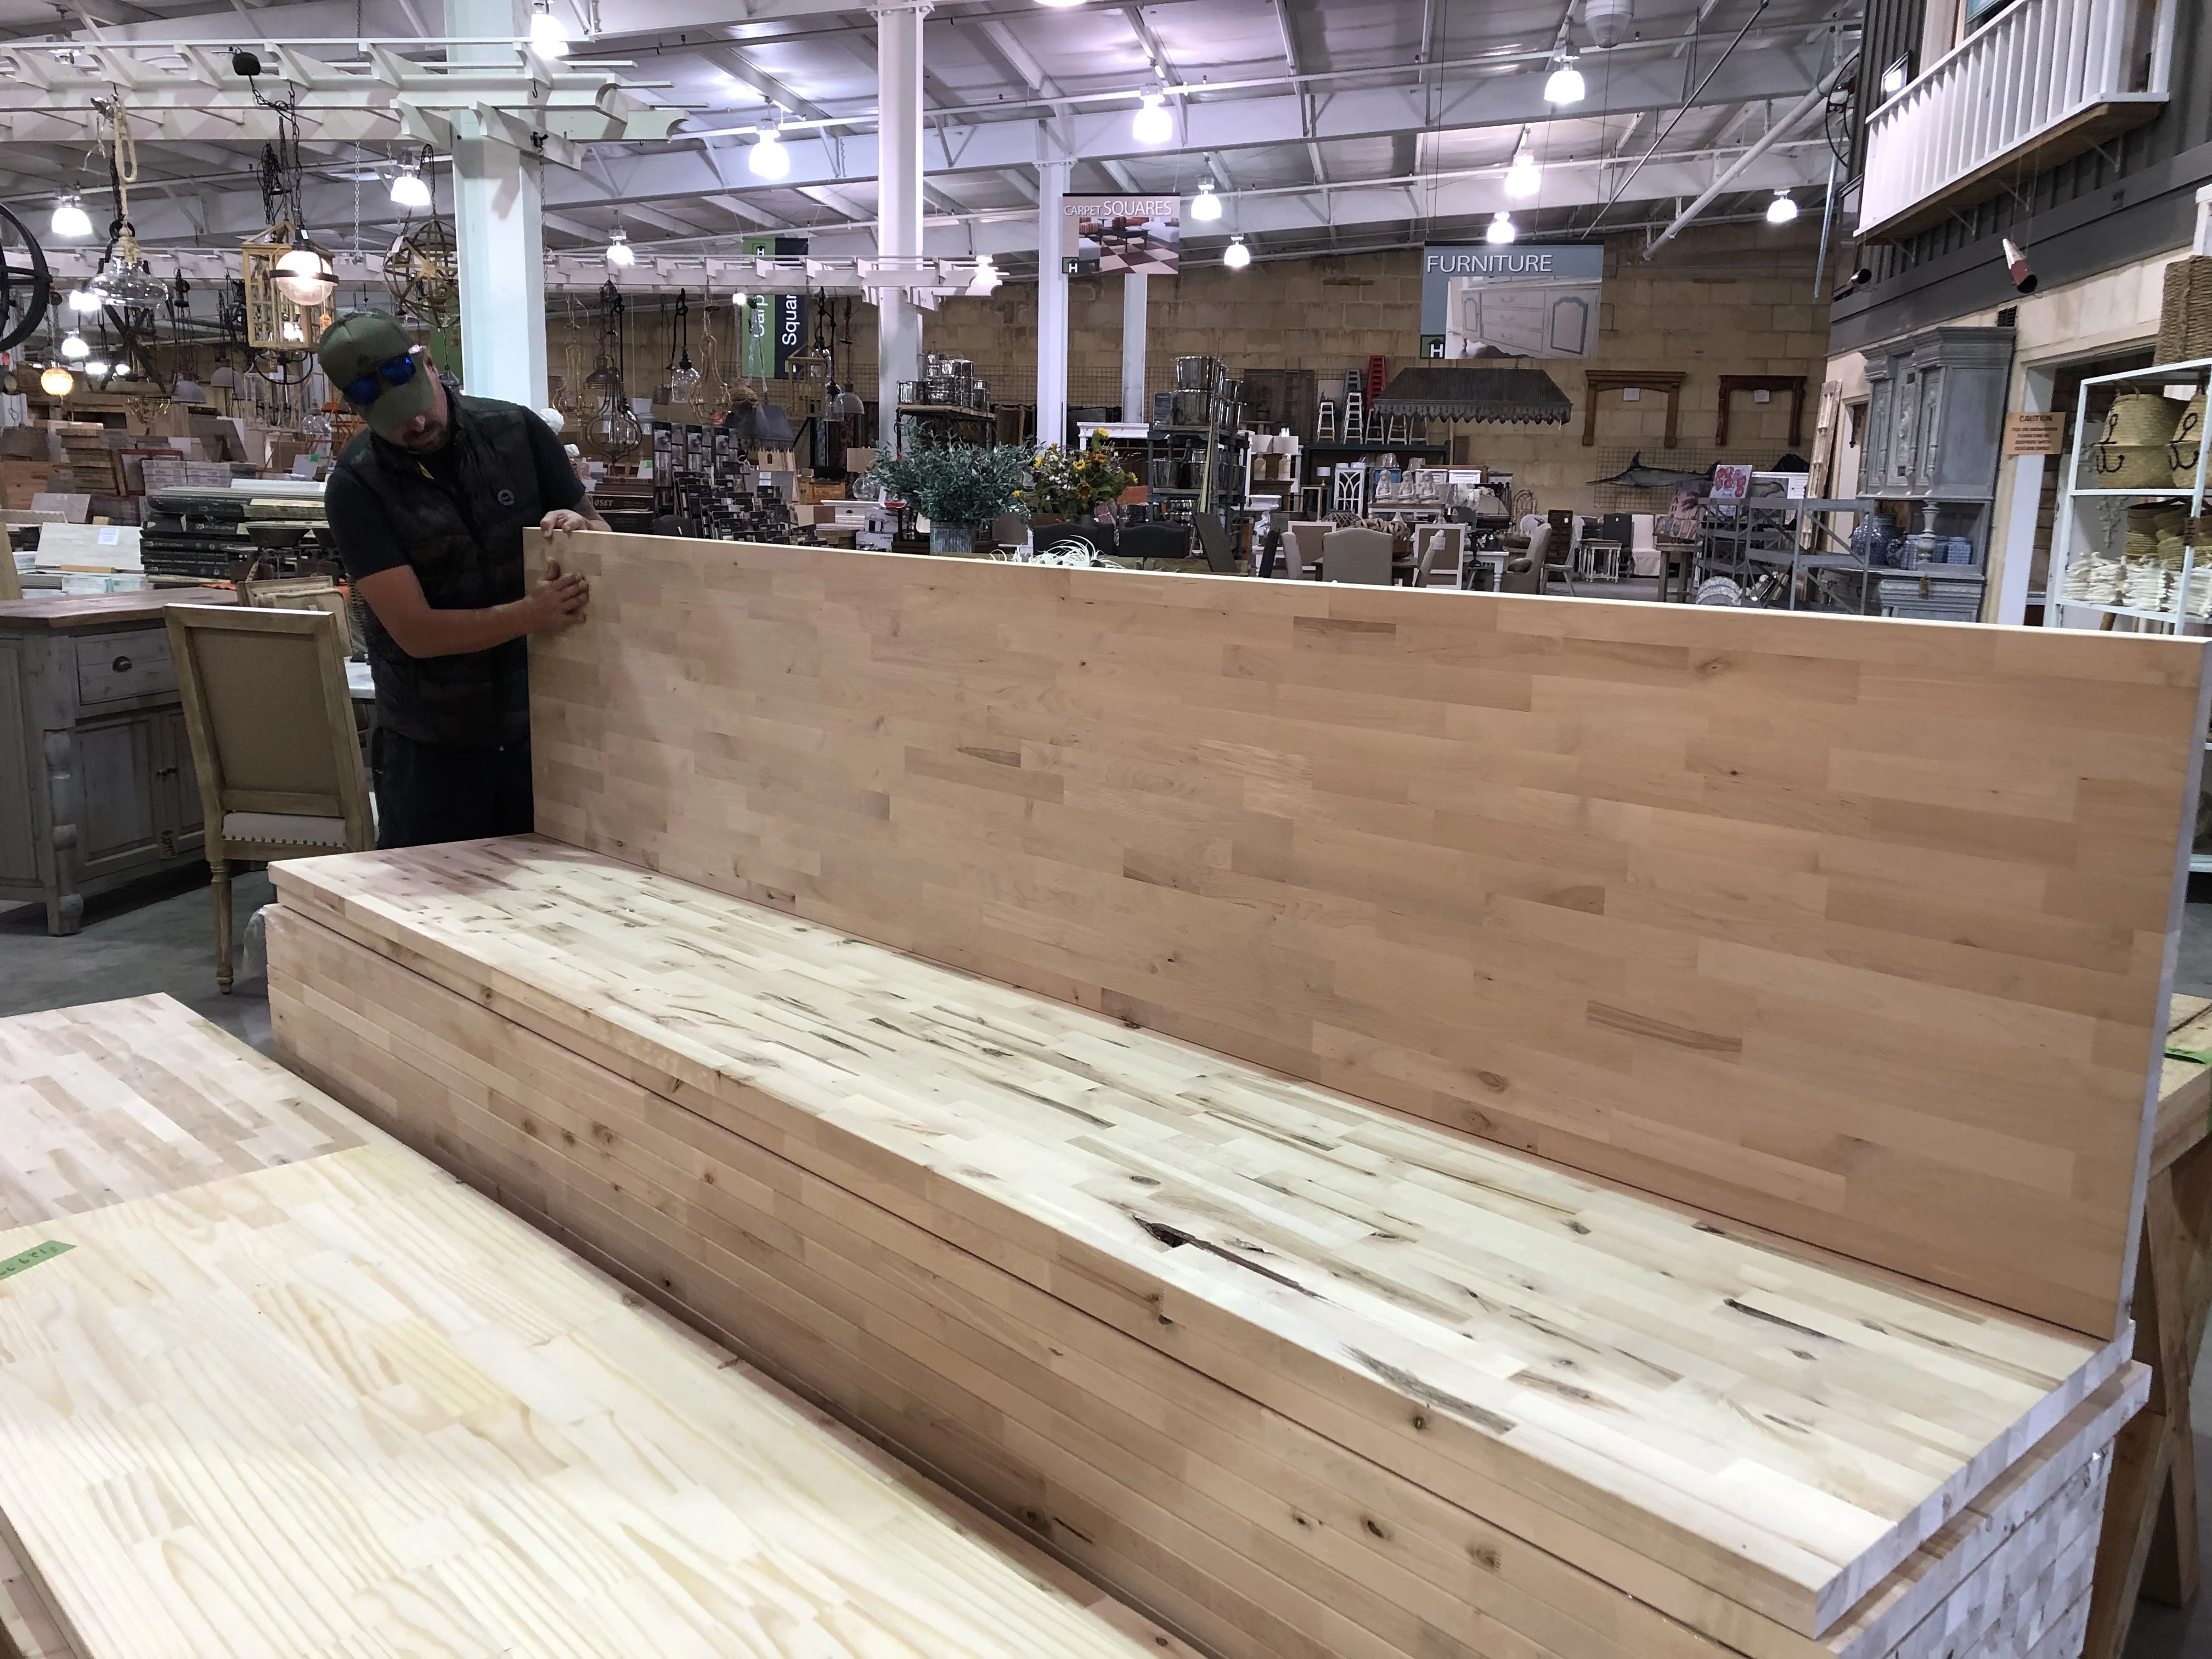
The long counter is a pretty key feature in this design, so I had to find the perfect counter top. I had the idea of getting a 10ft butchers block counter top and staining it a dark walnut color and sealing it up really well with some kind of urethane product to waterproof it. This means it’s not food safe and you can’t cut directly on the countertop, but I never intended to do that in the first place. If you want a butchers block you can cut on, you need to leave off the stain and seal it with a food grade conditioning oil and re-apply frequently.
I found the size butchers block I needed on the Home Depot website but between the cost of the counter and shipping, it left very little in our budget for the Airstream kitchen sink and faucet. I was so bummed, but we are trying to be cost effective and it just didn’t make sense. We ended up finding exactly what we wanted at a home discount supply store near us. We happened upon a whole pile of butchers block counters in different sizes and we ended up saving around $240! I was beyond thrilled.

Cut, Stain, Urethane
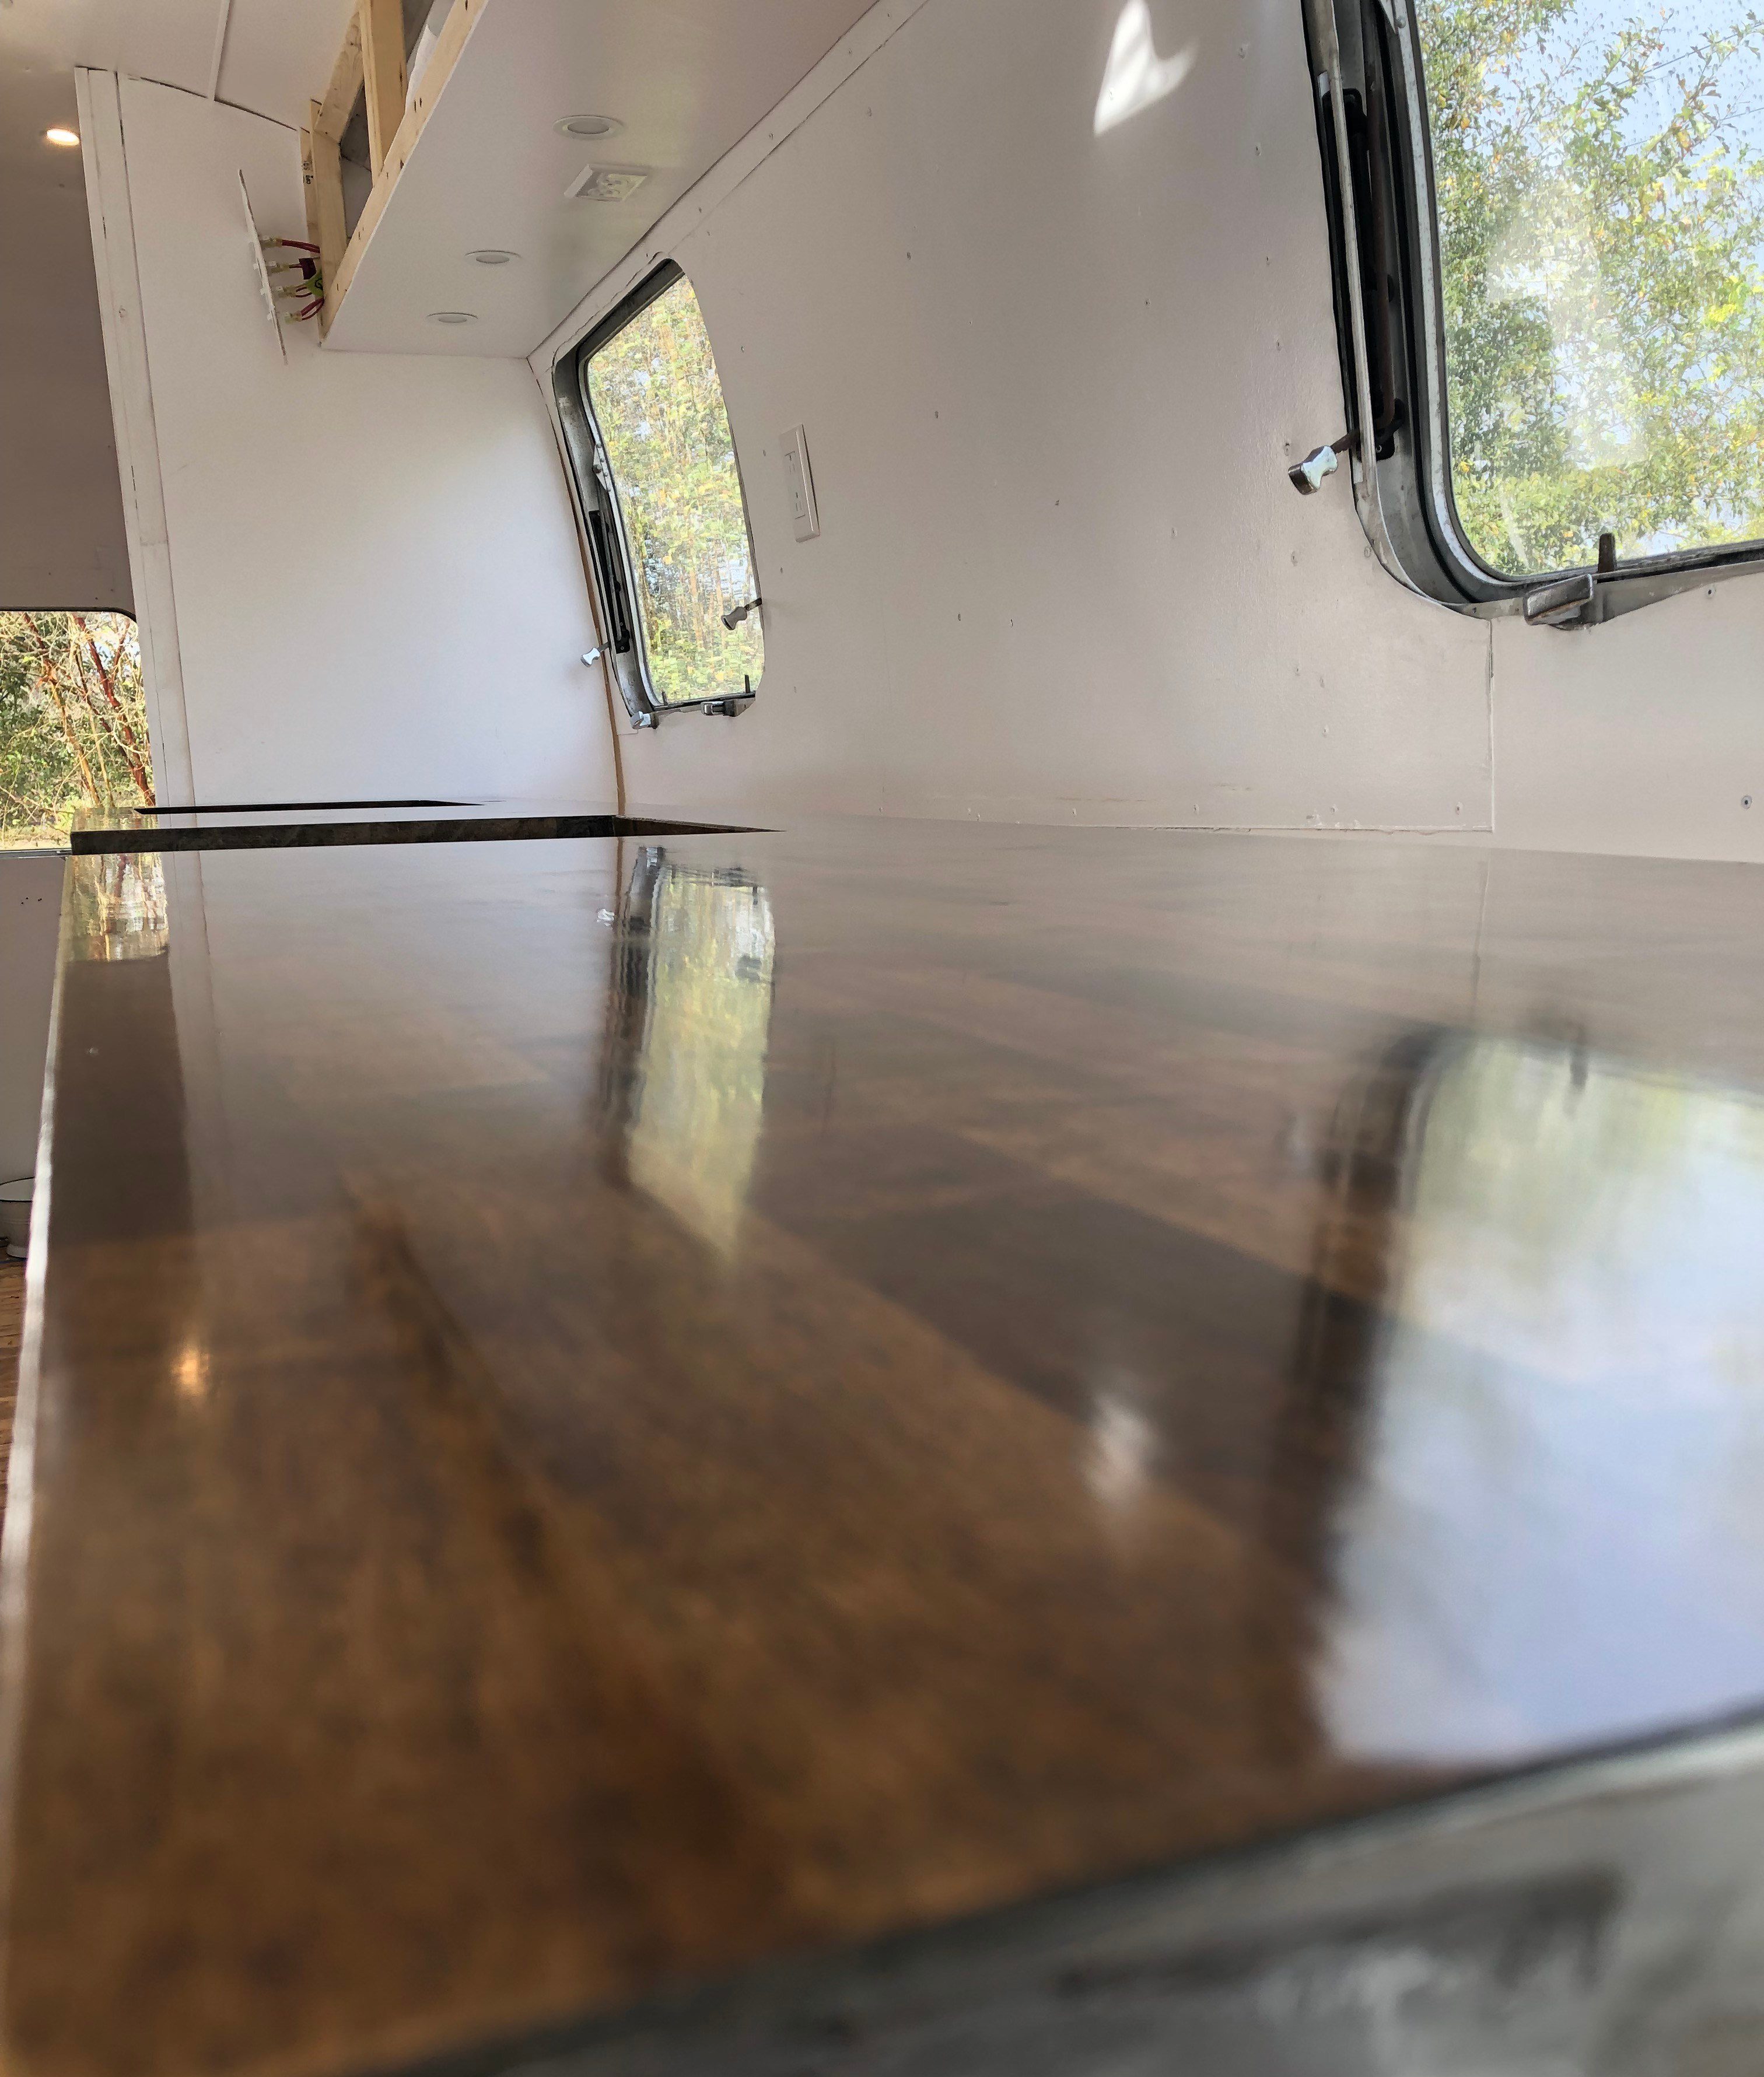
Next, we carefully cut out the holes for the sink and strove. Then, we stained it with 3 coats of Varathane Dark Walnut stain and let it dry thoroughly. We waited about an hour between coats and 24hrs to fully dry before sealing. When it comes to the sealing part we first tried a triple thick polyurethane and that ended up being a total fail. It was impossible to apply evenly and it left tons of streaks. We sanded that down as even as possible and went over it with two coats of Helmsman Spar Urethane. It applied in a nice even coat and turned out perfectly!
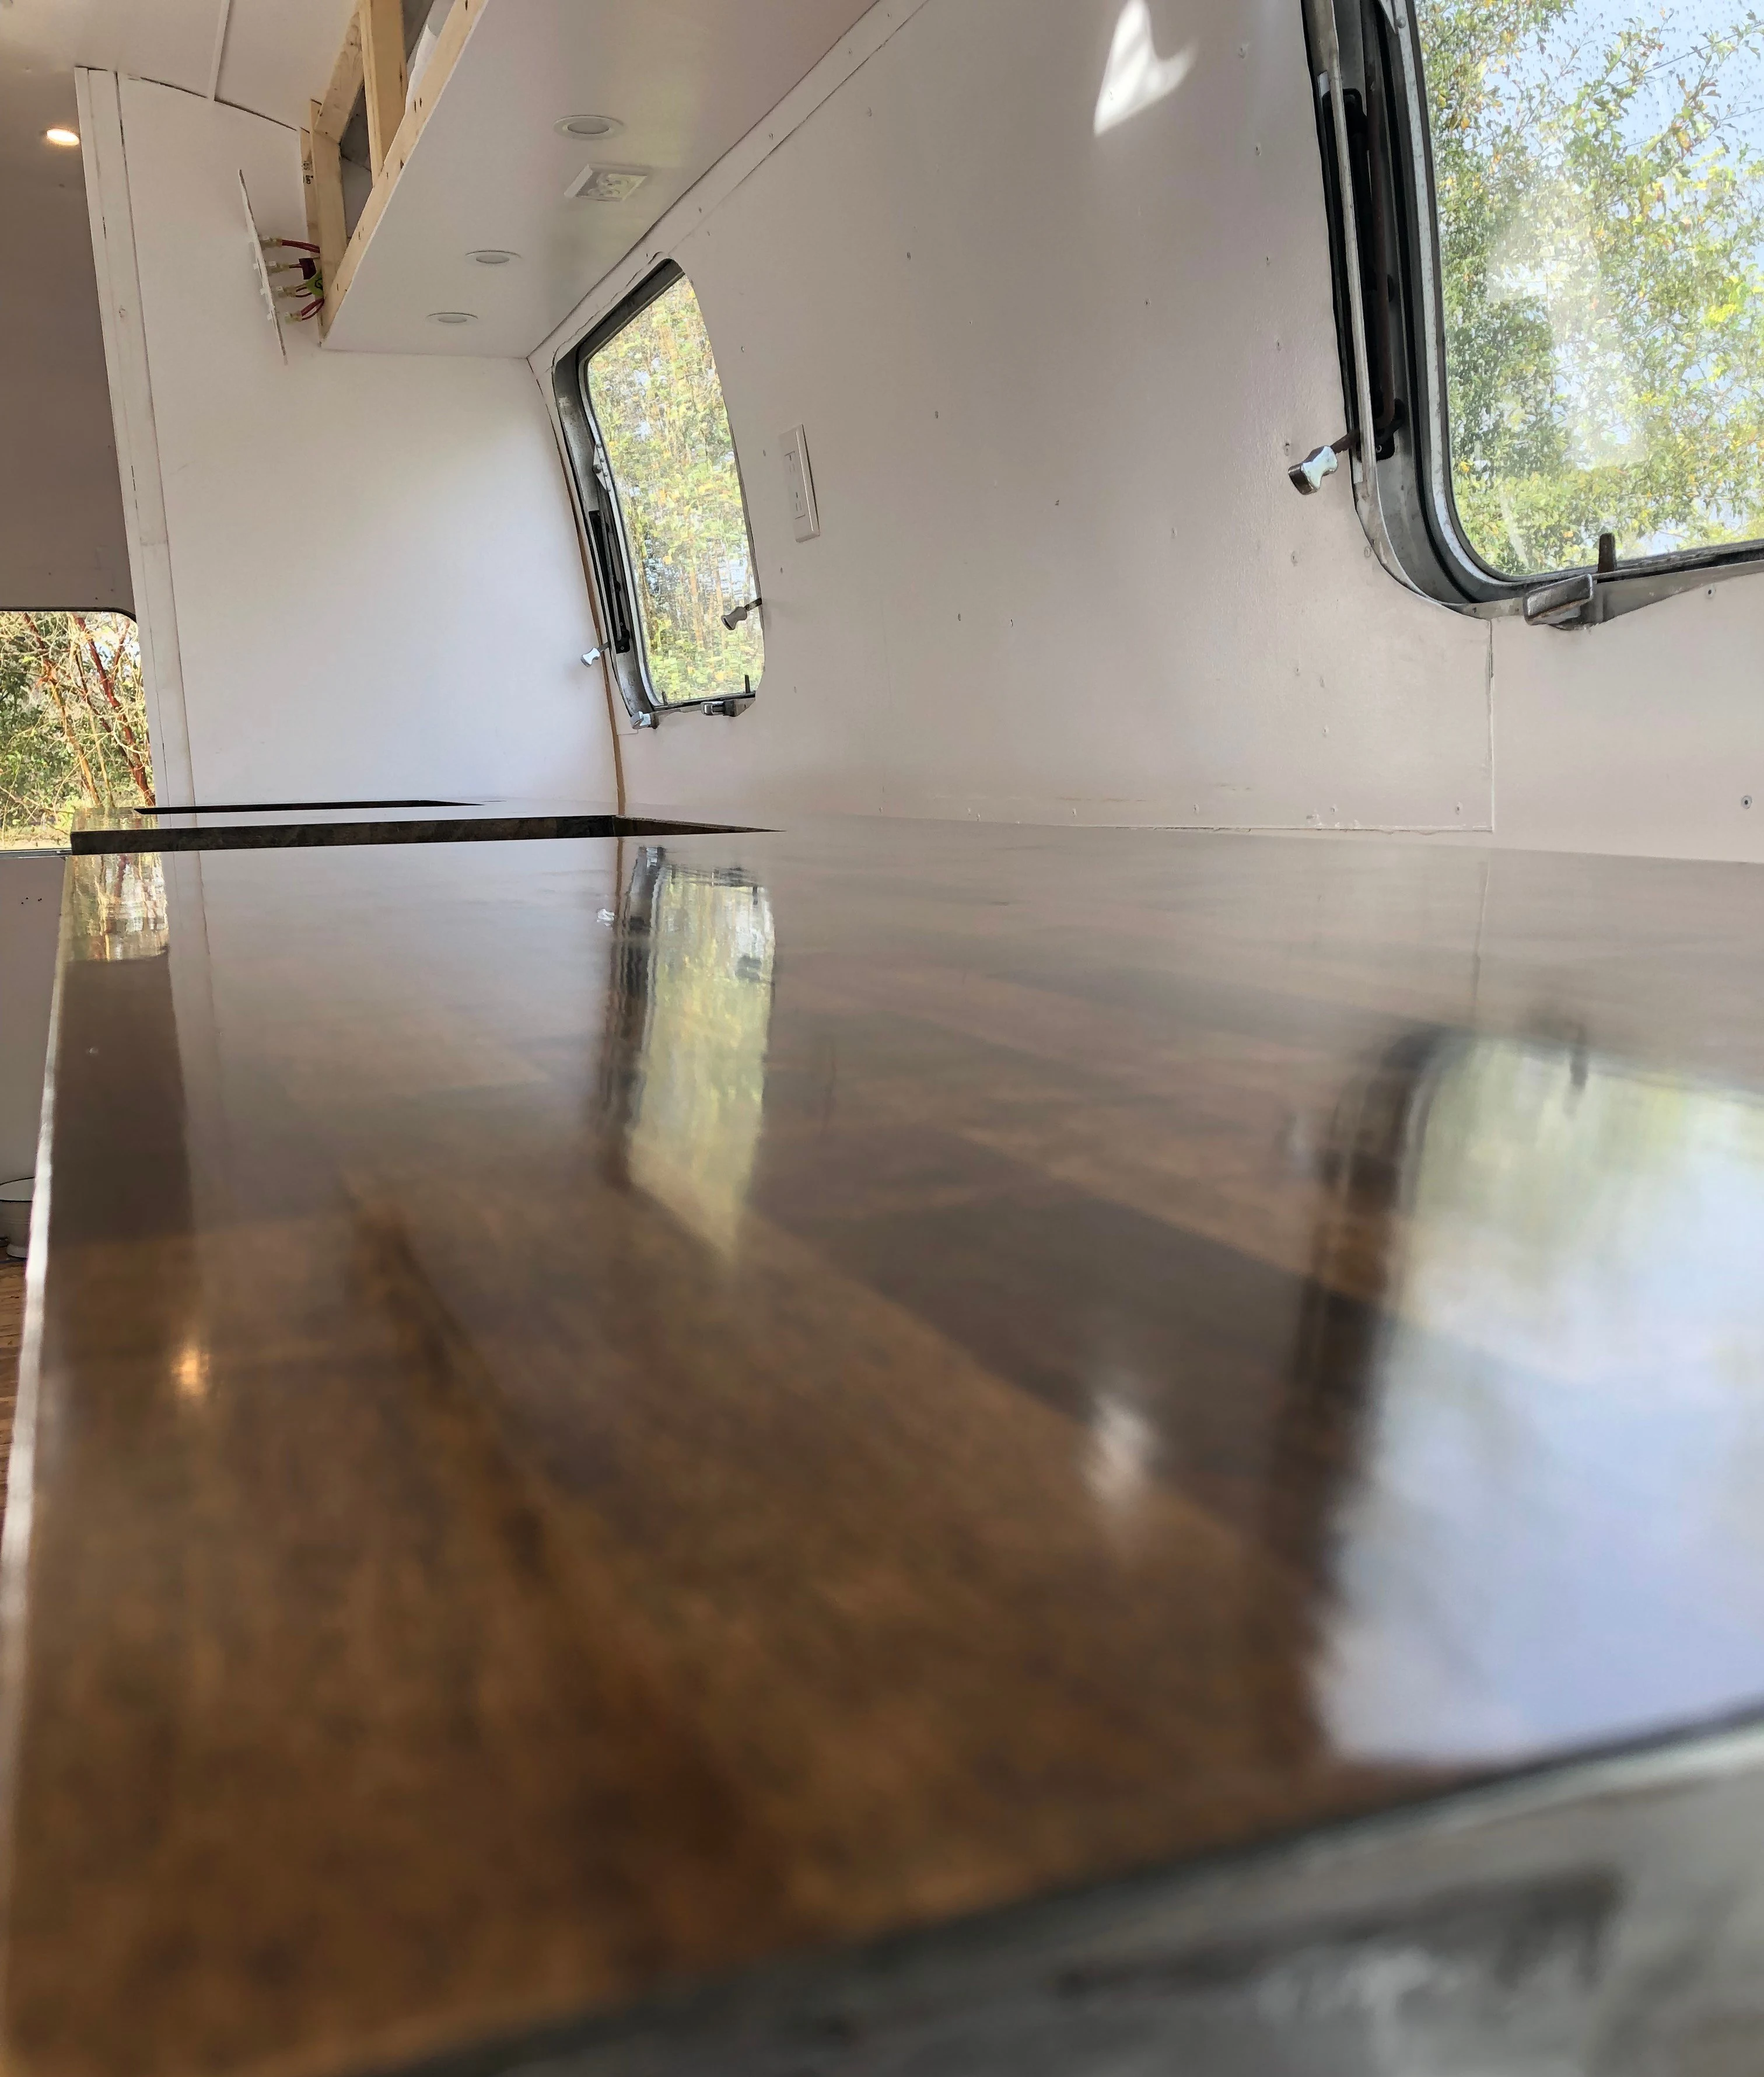
Installation / Airstream Kitchen
All that was left was to secure it down with brackets and install our beautiful black sink and faucet and our shiny new Dometic stove. Everything is plumbed up and we have running water, but we have to install the propane lines. It’s all coming together quickly and we’ll have cabinets finished by the end of the month!


Helping Hands
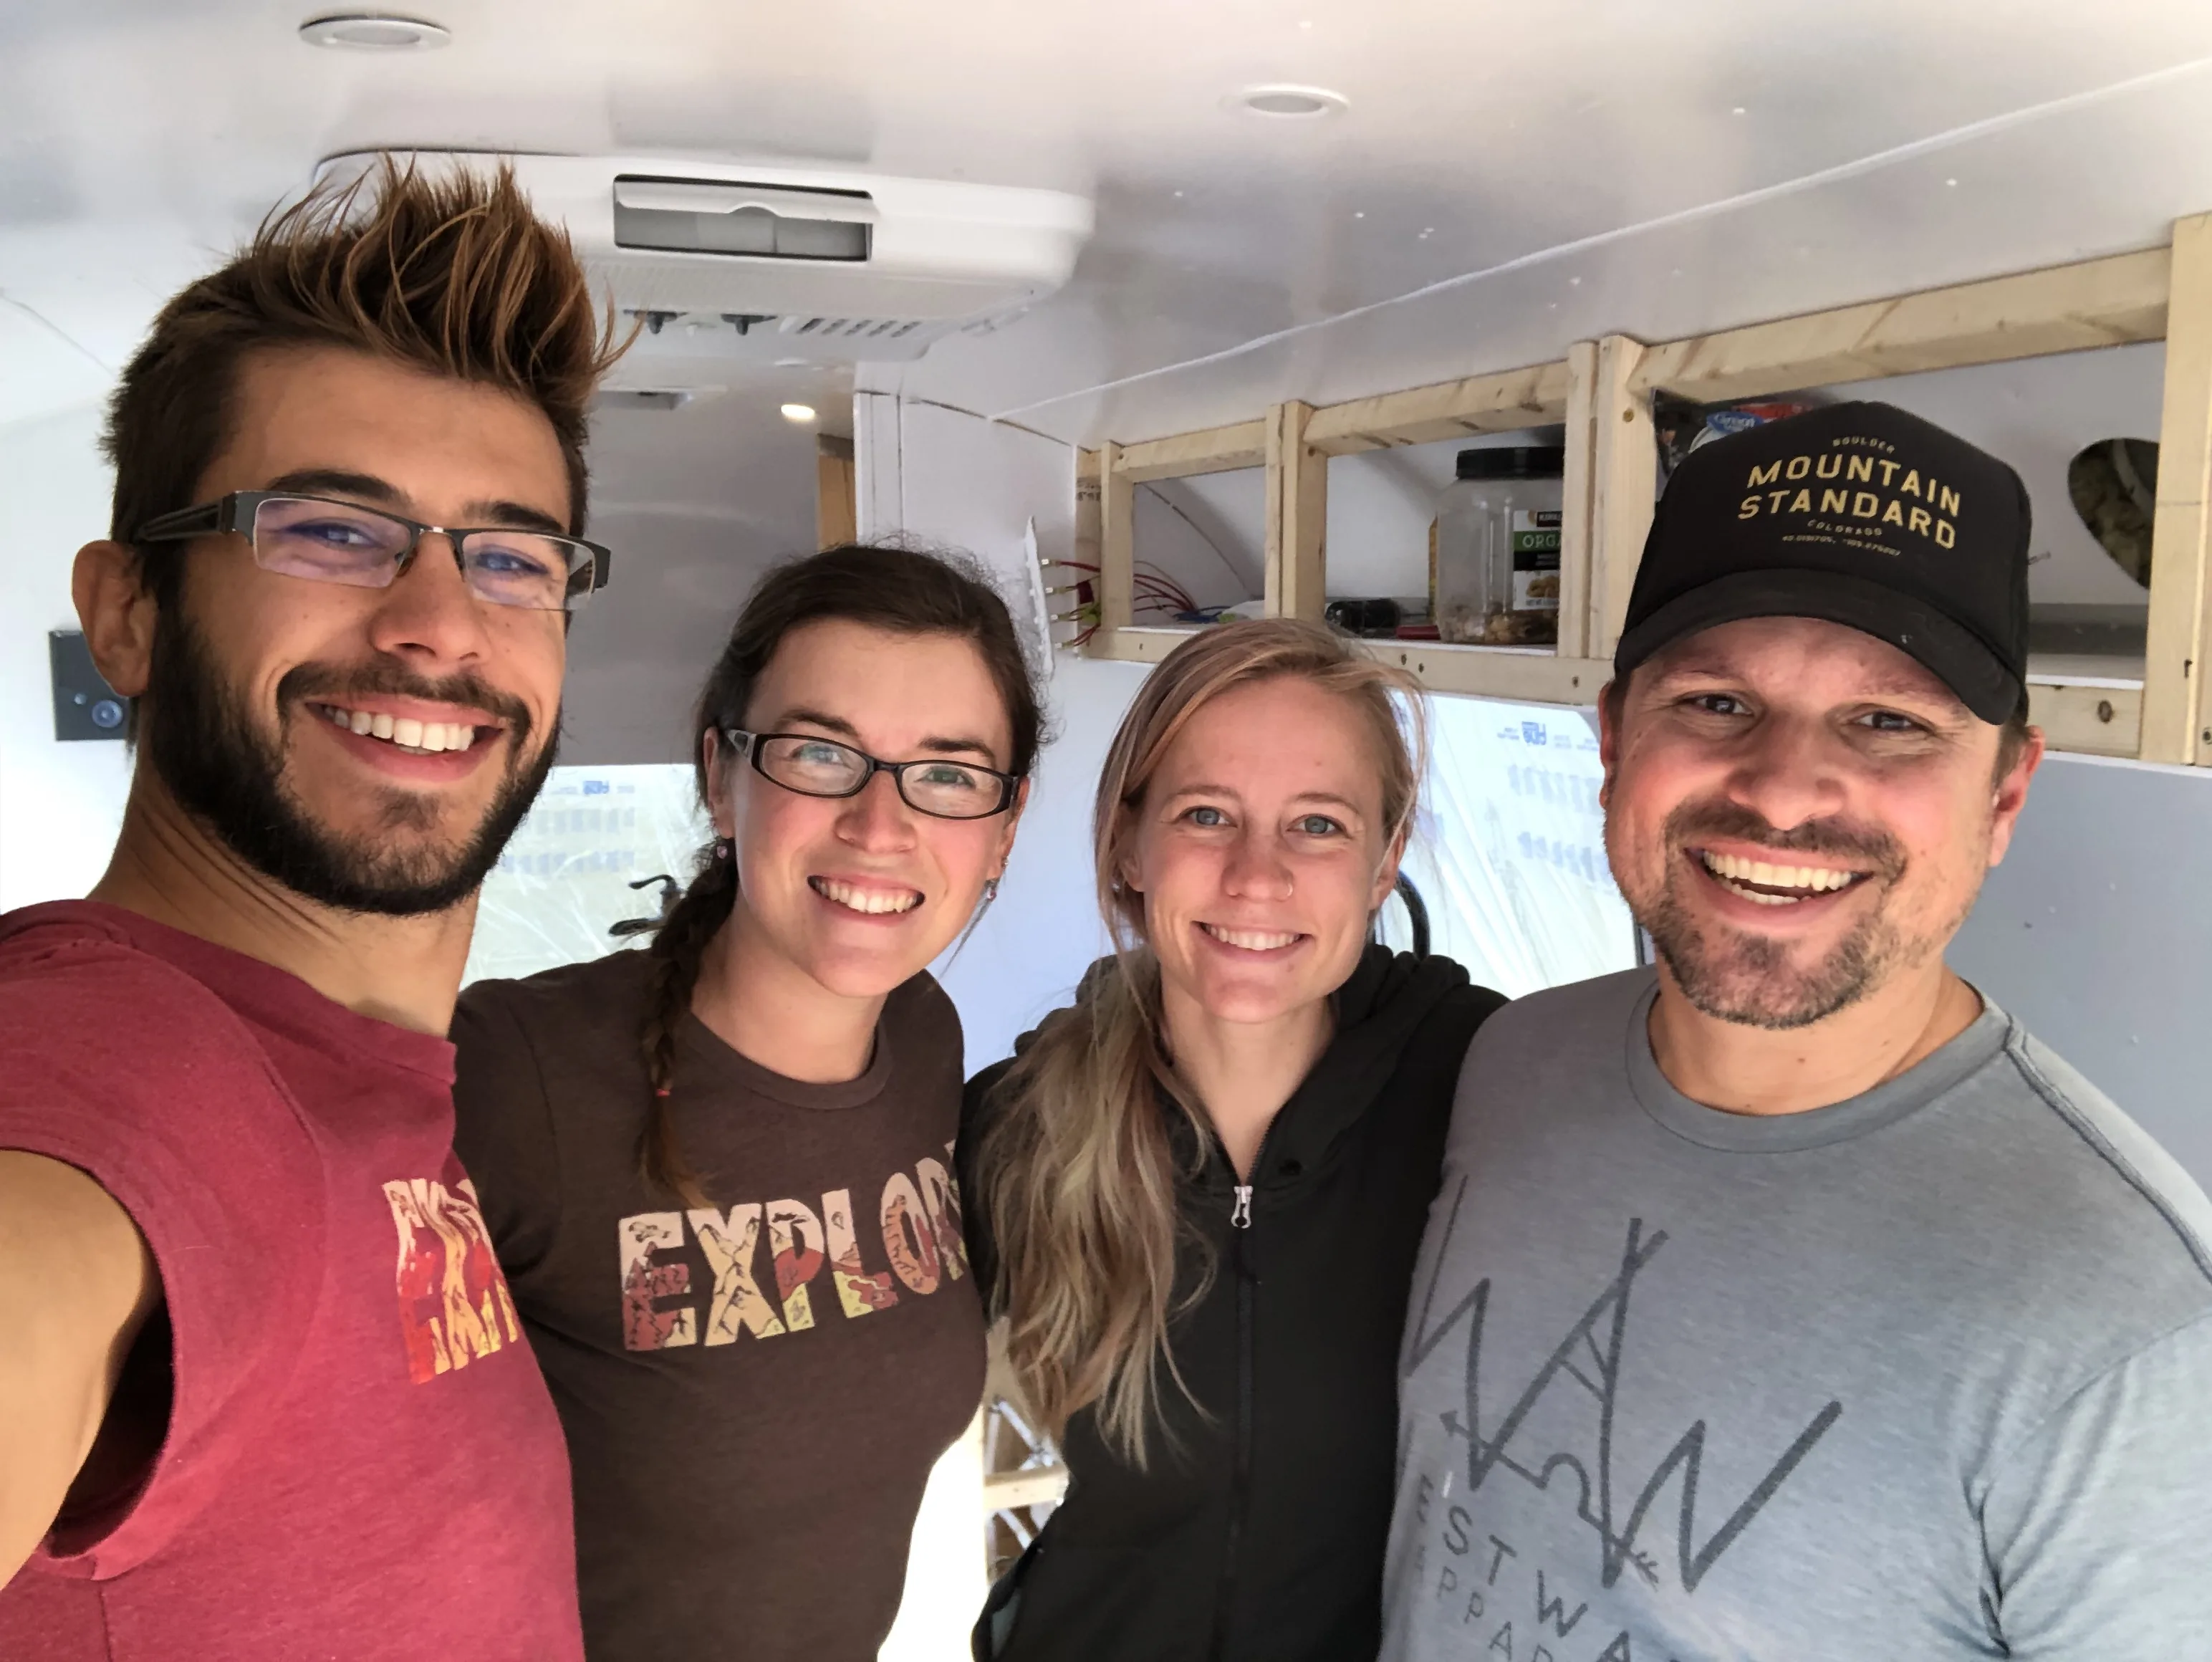
It’s so exciting to see our vision finally come to life and we couldn’t have gotten so much done so quickly if our friends Tom and Cait of Mortons on the Move, hadn’t come down and helped us out for the past month and a half. We’re so grateful to have such amazingly kind and hard working friends. We thoroughly enjoyed sharing this process together and the lifelong memories we created!
It’s so exciting to see that all your hard work will pay off soon! In the meantime, enjoy the break from all your hard work!