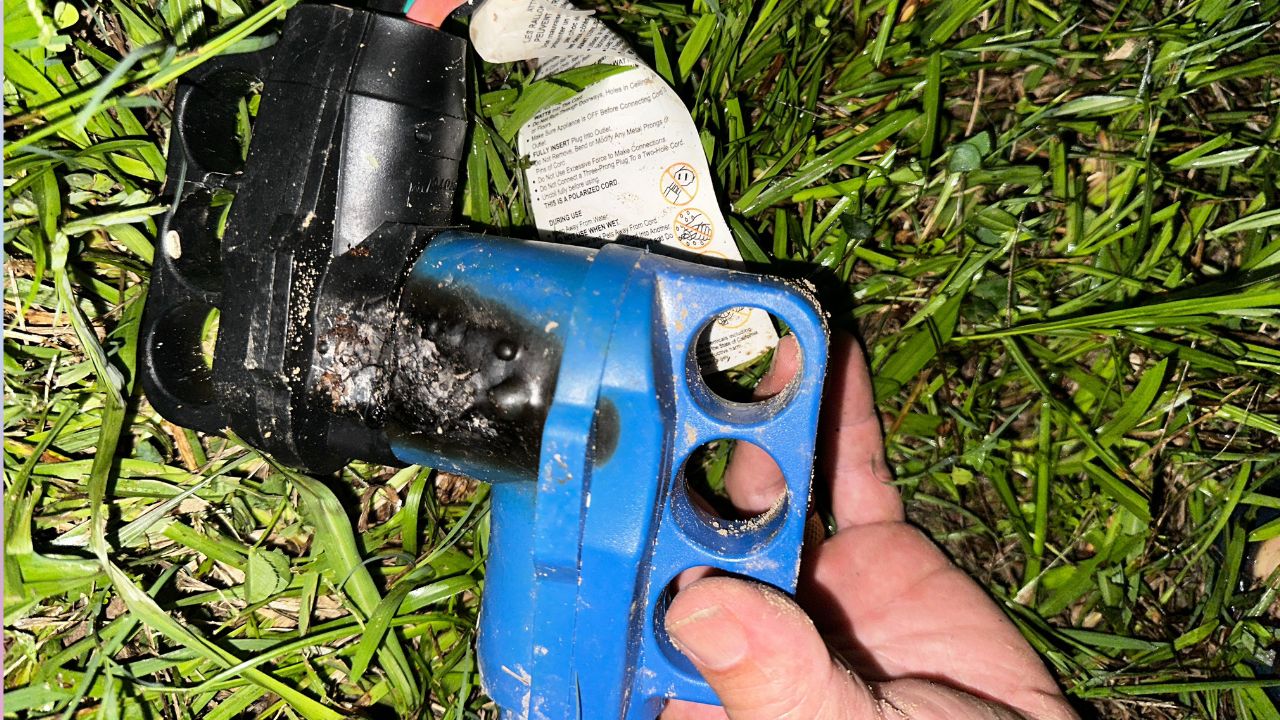
Alright, let’s set the scene: We’re moochdocking in the scorching heat of South Alabama, enjoying some farm life. Our RV is plugged into a proper 50-amp outlet, and when we went to cool off inside after some farm chores, BAM!
The temp inside hits 93 degrees. Houston, we have a problem—our electrical cords have melted. Here’s how we tackled this hot mess.
The Melted Cords Problem
Our setup with multiple cords daisy-chained to reach the outlet? Yeah, that was a disaster waiting to happen. Too much strain on the electrical system led to overheated and melted cords—definitely not the vibe we were going for.
Here’s how we got our cool back on track.
Why the Cords Melted
Let’s break it down, science-style:
Resistance and Heat: Every cord has some resistance. When electricity flows, resistance causes energy loss as heat. More connections mean more resistance points, which means more heat.
Daisy-Chaining Cords: By using multiple cords (all 50 amp rated), we created weak points with higher resistance. These hotspots got hot enough to melt the cords.
High Electrical Load: We’re running three air conditioners. That’s a serious power draw on steaming hot Alabama days. The high voltage needed to keep us cool pushed the cords beyond their limits, causing even more heat at the connection points.
The Solution
1. Moved the RV Closer to the Outlet: First up, we rolled the RV closer to the outlet. Less distance = fewer cords = less chance of overheating. Simple math, big results.
2. Used Ideal Single Cord: Instead of a daisy chain of a long and short cord, we went with our ideal, beefiest, 50-foot cord. Lower resistance, less heat. If you don’t have a long, heavy-duty cord, it’s time to level up your gear. BTW, the shortest cord still wouldn’t reach the 50 amp outlet, otherwise we would’ve used it instead.
With a 42-foot 5th wheel, sometimes you have to compromise (especially when moochdocking).
3. Rewired the Melted End with a Camco Power Grip Replacement Plug: For the crispy end of our cord, we slapped on the Camco Power Grip Camper/RV Replacement Plug. This plug is a lifesaver. Easy to install, durable, and peace of mind? Yes, please.

The Biggest Hassles of the Job
Like any DIY project, we hit a few snags:
Finding the 50 Amp Male End: This was like a scavenger hunt. Nearby RV stores? Nada. Finally found it at our local Ace Hardware. Pro tip: Don’t waste time, check hardware stores or go online first.
Attaching the RV and Securing the Inside: Moving the RV just 10 feet was more work than we thought. Securing everything inside to avoid a mess? Total workout. Always double-check that everything’s battened down before moving.
Step-by-Step Guide to Installing the Camco Power Grip Replacement Plug
Gear up with these tools for a smooth install:
- Wire Cutters/Strippers: To chop off the damaged plug and strip the insulation.
- Screwdrivers: Flathead and Phillips for opening the plug housing and securing the wires.
- Utility Knife: Trim excess insulation like a pro.
- Multimeter (optional but smart): To test connections and avoid shorts.
- Electrical Tape: Extra insulation, always a good idea.
- Pliers: For bending and securing wires in place.
Here’s the play-by-play:
- Safety First: Disconnect the RV from the power source.
- Cut Off the Damaged Plug: Snip the melted end with wire cutters.
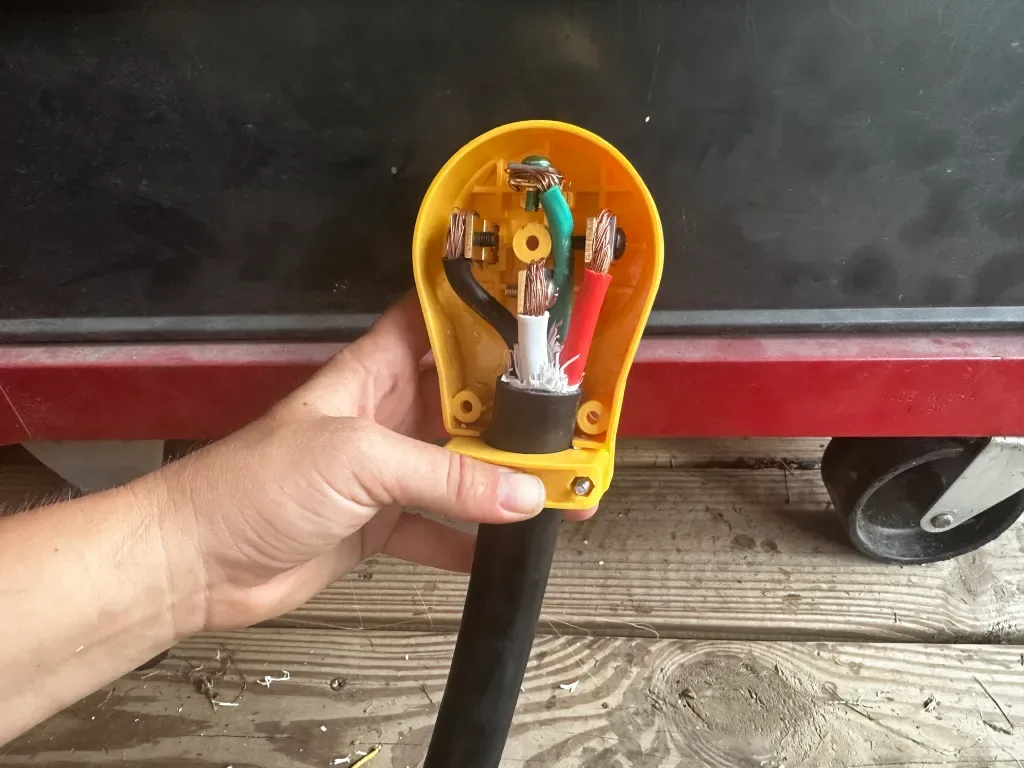
- Prepare the Wires: Strip about an inch of insulation to expose the copper.
- Attach the New Plug: Open the Camco Power Grip and connect wires to the right terminals—black to brass, white to silver, green to ground (or follow the simple instructions in the package as we did).
- Secure Everything: Tighten screws for a firm connection, then reassemble the plug housing.
- Test It Out: Reconnect to the power source and check for any issues. If it’s all good, you’re golden.
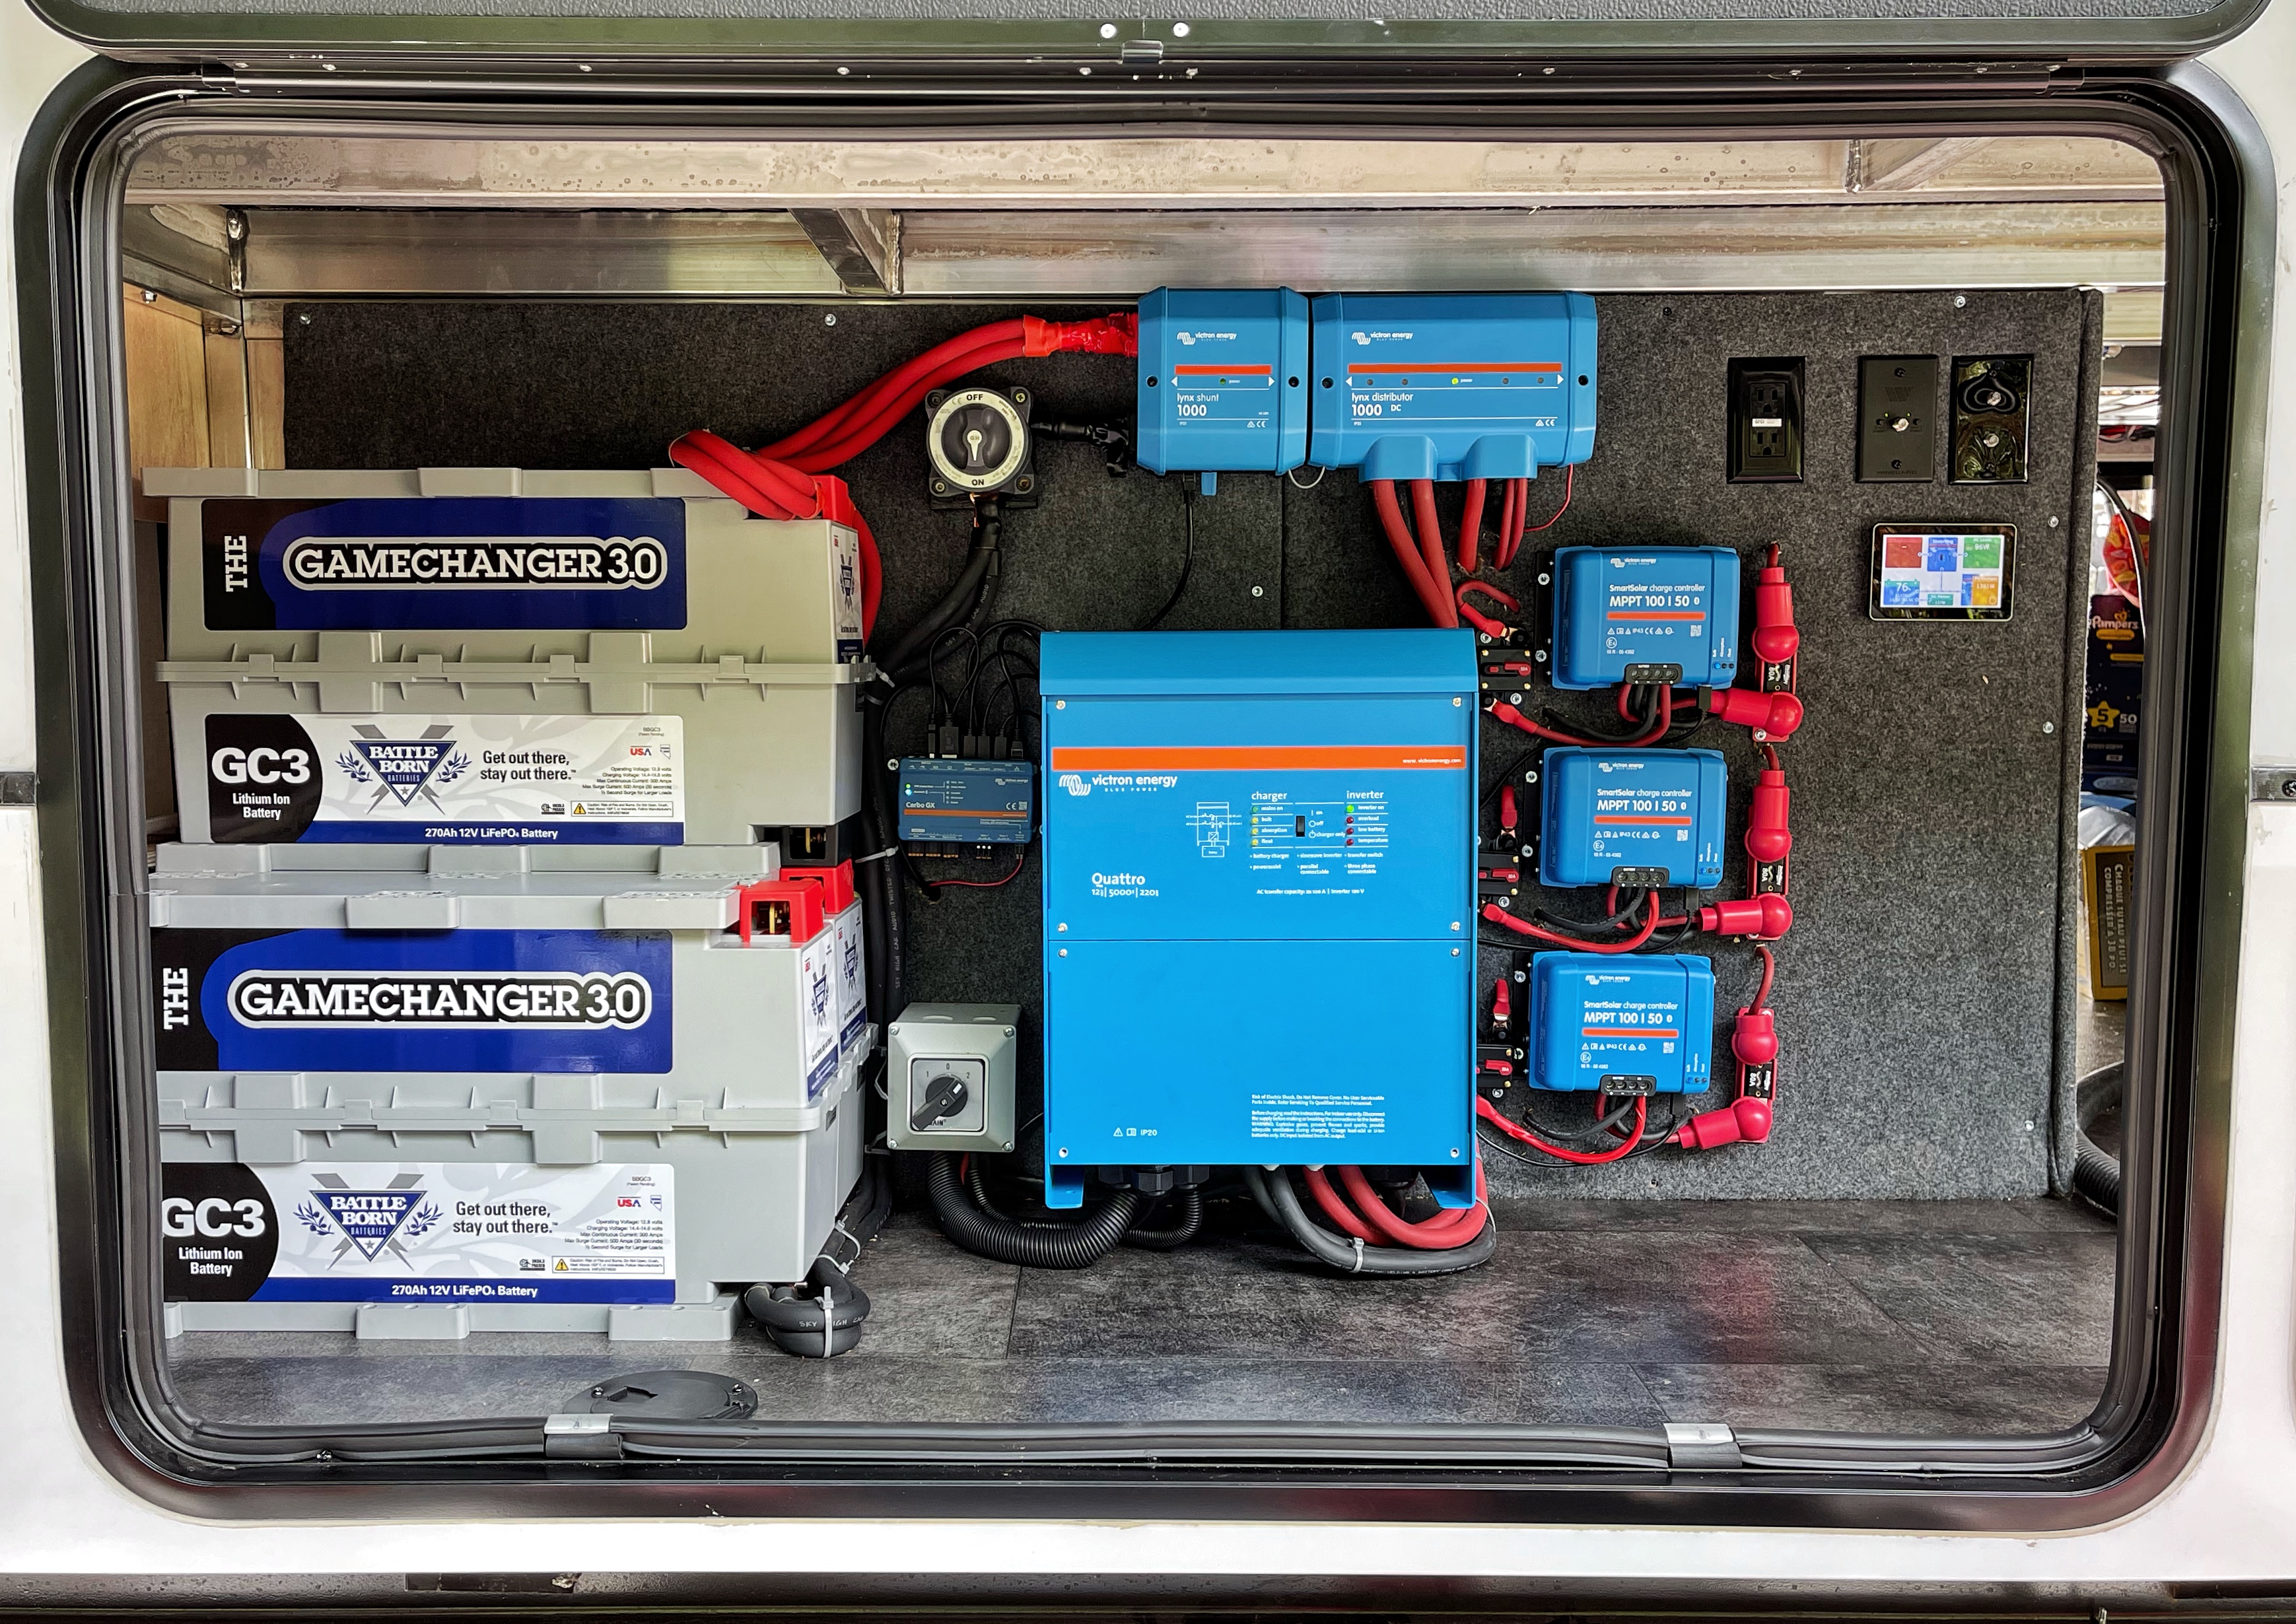
But, What About Our Solar Power and Lithium Batteries?
Well, the initial meltage caused a fault in the brain of our electrical system, which took everything offline. Once we found the problem and checked our inverter setup, we reset the system with only one air conditioner.
This happened at 3 AM. The witching hour, right?
Once we woke up in the morning and checked our lithium battery percentage, it was 45%. We kept a single air conditioner running all day to maintain our sanity.
It was partly cloudy but hot outside. The lithium batteries held the 40% mark until afternoon, when we eventually dropped to 13% (at 7 PM). It got cloudier as the evening neared.
Fortunately, that’s when we got everything fixed and plugged back in.
Our RV AC Load is currently 2531 watts. The grid is providing 4418 watts of power, and the remaining load is recharging our battery system.

Final Thoughts on Our Scary Melted RV Cord Situation
Melting RV cords? Total buzzkill. But with the right moves, you can fix it and get back to living your best RV life. Move closer to the outlet, use a solid cord, and replace the damaged plug with a trusty Camco Power Grip.
We learned a few other side notes: Keep connecting cords off the ground and out of the elements. If at all possible, keep your cord shaded underneath your RV during those intensely sunny summer days.
And there it is! A straightforward fix to a gnarly problem. Electrical safety is no joke. Keep your cords and connections in check, and don’t hesitate to upgrade your gear for smooth and safe travels.
We’ll Help You Find the Best Free Camping in the USA
You should give it a try!
As a matter of fact, these free campsites are yours to enjoy. Every time you pay federal taxes, you’re contributing to these lands.
Become a FREE CAMPING INSIDER and join the 100,000 campers who love to score the best site!
We’ll send you the 50 Best Free Campsites in the USA (one per state). Access the list by submitting your email below: